 Follow TingTingMamMa
Showing posts with label bag. Show all posts
Showing posts with label bag. Show all posts
Sunday, February 21, 2016
Triple-Zip Cross the Body Bag
I wanted to make my mother-in-law a Christmas gift that she can use everyday. She travels light and she is very practical. So I thought a cross the body bag would be just the thing for her. It was a learning curve for me to make a bag with multiple zippers. It took me the winter break week to plan and construct this bag. I love the colors and the light weight of this bag! Who knows, maybe I will have the patience to make another one someday.
 Follow TingTingMamMa
 Follow TingTingMamMa
Posted by
Deb

0
comments
Labels:
bag,
DIY,
sewing
Thursday, January 15, 2015
Tutorial: Easy Zipper Yarn Dispenser Bag
It all began with one multi-colored shower curtain. From the same curtain, I've made a tripod bag, a trash bag for the car and a back support pillow. I love the vibrant colors, the stripes, the heavier weight fabric and the grommets.
I wanted to utilize the grommets and thought a yarn dispenser bag would do just that.
Here's how I made the zipper yarn dispenser bag:
Cut a piece of fabric measuring 11" x 26". (I have folded the curtain lengthwise, thus it appears to be 11" x 13" in the picture.)
Be sure to put into consideration the grommet placement and that the grommets should be on one of the shorter ends.
*Since the grommet end is already finished, you will be attaching the zipper and top stitching with just one step!
Mark the center of the zipper (13" long) and the shorter ends of fabric. With the zipper right side up, lay the fabric (grommet end, right side up) on the zipper, and match center marks.
Pin, pin, pin.
Change your sewing foot to a zipper foot and stitch.
Now, attaching the other side of the zipper with right side of the zipper and right side of fabric facing. Match center marks, pin and stitch. Turn the fabric right side out. Top stitch.
*OPEN the zipper! (so you could turn the bag right side out with you are done sewing.)
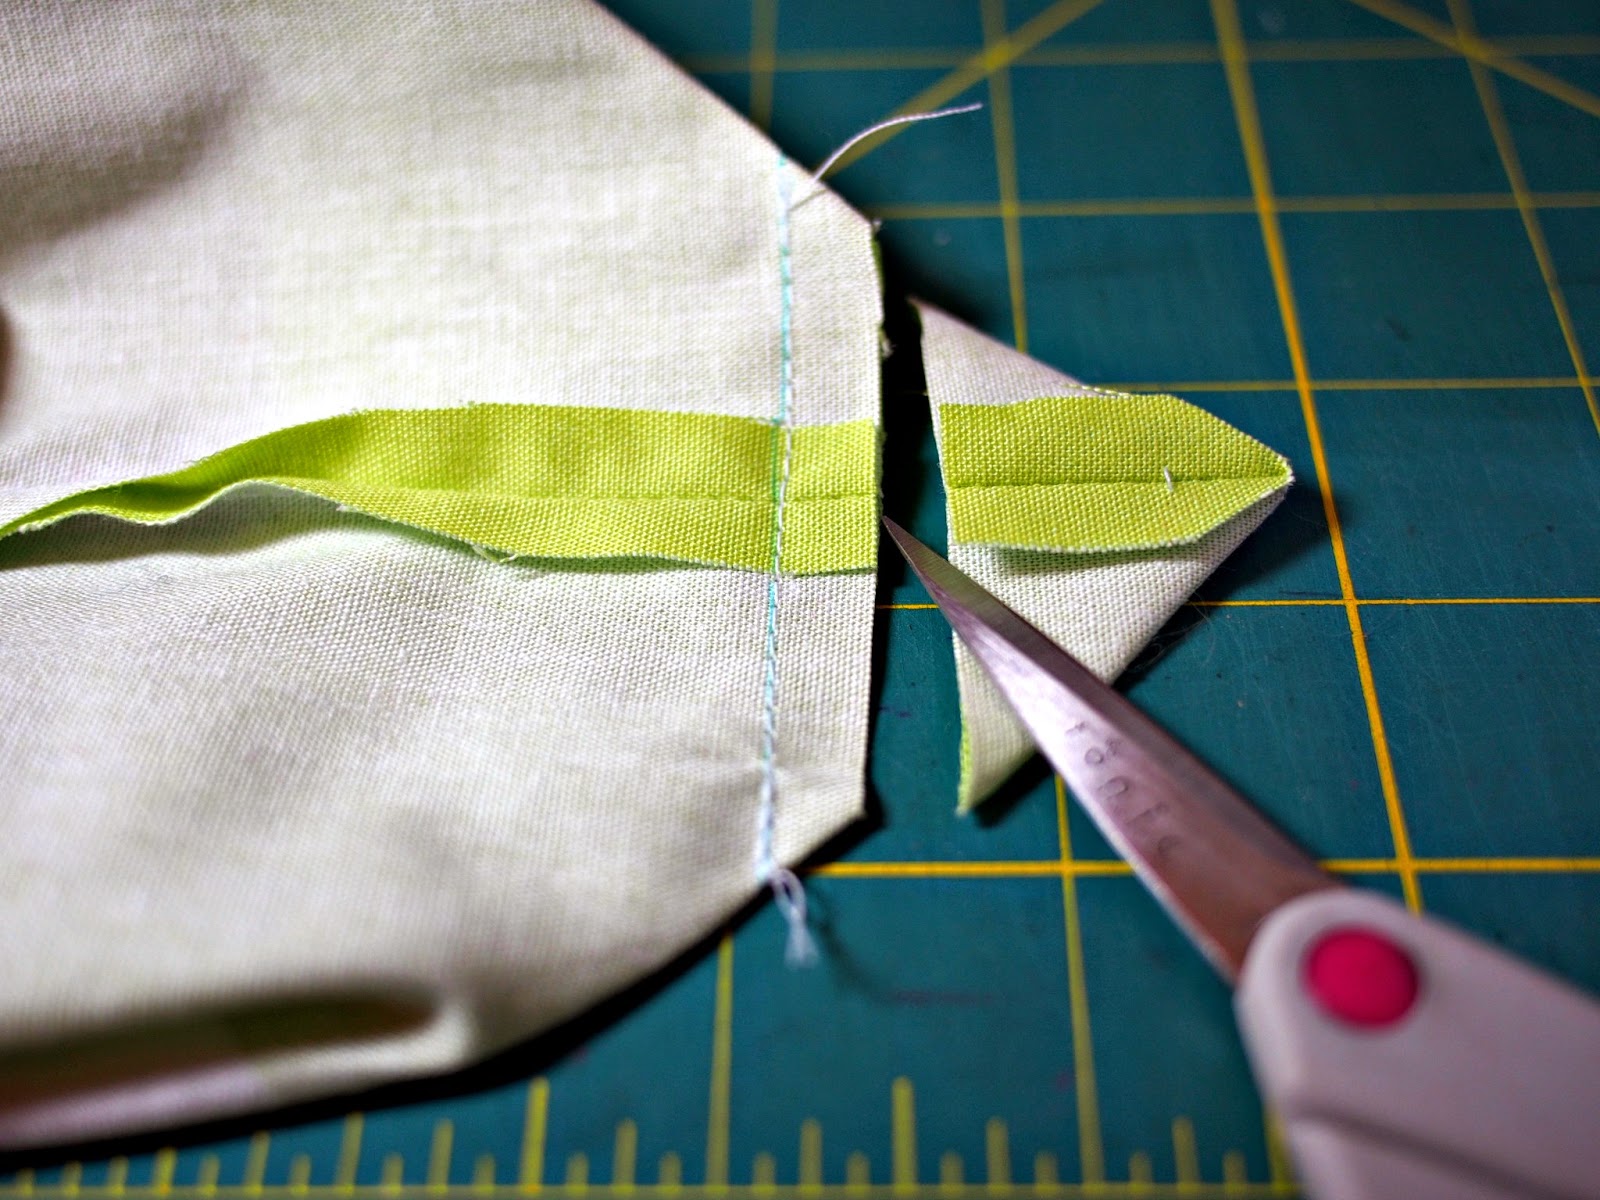
Turn the fabric wrong side out. Leave 1 1/2" on top of the zipper, pin and stitch both open ends close. (stitch over the zipper back and forth a few times) Clip the excess zipper ends.With the seam facing up, pull one the bottom corners to create a point.
Measure 1 1/2" from the point and mark sewing line with water soluble pen.
You could clip the raw edges with pinking shears. Or...
Bind it with bias tape.
Cut single fold bias tape 1/2" to 3/4" longer than the raw edge.
Unfold the bias tape lengthwise. With wrong side facing up, lay bias tape along the raw edge. Fold in the 2 short ends of bias to match the length of raw edge. Pin.
Stitch right on the fold closest to the edge. Then, fold the bias tape to the other side. Fold in the 2nd fold to sandwich the raw edge and pin.
Select a short zig zag stitch on your machine.
Stitch. Turn the bag right side out.
Put your ball/skein of yarn in the bag and thread the yarn through the grommet. I am now ready to knit my next project!
 Follow TingTingMamMa
Posted by
Deb

Sunday, November 23, 2014
Bubble Pouch
I promised Joanna that I would make her a felt doughnut key chain awhile back. But, if you know me, when I feel uninspired, I just could not get to the project. The guilt and shame of not keeping my words just ate at me. So, many moons later, I thought, why not make something else for her instead. And I did. This is a tiny pouch (Michelle Pattern) that sits in your palm, perfect for a lip balm and a small tube of hand lotion. I feel so relieved after handing it to Joanna. But, guess what, on that same day, Joanna gave me a bag of fabrics! Ooh la la!! Thank you, Joanna!

 Follow TingTingMamMa
Posted by
Deb

Completed! Michelle Patterns Messenger Bag

Remember this project that was not going anywhere because I added unnecessary seam allowance back in May? Well, I bring great news. After receiving many encouraging words, I managed to get out of my sulky mode and finished the messenger bag toward the end of the same month. I added a shoulder pad for comfort and have been carrying the bag places since then. I am so pleasantly surprised to find how much it could hold! I have been too busy to post the pictures until now. Here it is.
 Follow TingTingMamMa
Posted by
Deb

0
comments
Labels:
bag,
DIY,
sewing
Monday, May 5, 2014
Feeling Stuck
I started sewing a Michelle pattern messenger bag back in January. Loved (and still love) the pattern. But when I was half way into sewing the bag, I realized that I added 3/4" seam allowance to all the cut fabric! I was horrified! What could I do? At first, I was in denial and said to myself that the proportion of the bag would not change if every side added the same seam allowance. But who am I kidding. I had to figure out with seam allowance was necessary and which could be left along. The 3/4" does not help, either. I did not want to deal with fractions. I wanted to SEW! It was a mess.
It's been almost 4 months now and I have not had the courage to finish this bag. I have found ways to escape by completing 2 other bags and shifting my attention to gardening. Sigh. Aiyah, so stuck.

Follow TingTingMamMa
It's been almost 4 months now and I have not had the courage to finish this bag. I have found ways to escape by completing 2 other bags and shifting my attention to gardening. Sigh. Aiyah, so stuck.

Posted by
Deb

0
comments
Labels:
bag,
craft room,
DIY,
sewing
Thursday, August 22, 2013
Tuesday, July 23, 2013
Big Girl's Ballet Bag
I am thankful that although F loves everything adorable (like mamma), she is not into brand name items or clothing. She's been practical and sensible so far. When she started dancing at her current school a few years back, I gave her this striped zippered bag (pictures below) as her ballet bag. (and, no, I did not make it.) Recently, I looked into the bag and found that the bag was so abused well-loved, the lining was ripping, and the zipper came apart. There was no way to save it. It's time...
TO SEW!! Faith had a hard time letting the bag go. But I was very excited to start this project. Hehehe. Faith requested to have a bag that looks like the Miss W Bag, with the same width of the old ballet bag, a bit deeper, same length for handles, no zipper for closure but instead, a welted zipper pocket.
So, I measured the old bag and started cutting and sewing. I added a button and a loop for closure, and a key holder (ribbon and O-ring) at one end. Within 3 nights, the bag was done. My next project for her is to make a draw string dance shoe bag with the floral print. Hope this one get to last longer than the last.

Follow TingTingMamMa
Friday, June 28, 2013
Sweet Pea Tote
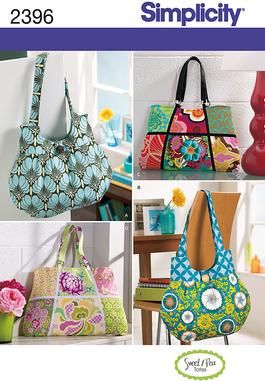
Made this tote using Simplicity pattern 2396.

Whenever I sew a project, the most


Posted by
Deb

0
comments
Labels:
bag,
DIY,
sewing
Monday, May 27, 2013
Tutorial: Miss W Bag
It's that time of the year when I feel like shouting woo-hoo to the teachers for persevering through a long, yet fast-paced and fruitful school year.
Teachers have so many amazing qualities: patient (to both the students and the parents), loving, smart (let's never forget this one!), encouraging, creative, resourceful, patient (did I mention this one already?) and energetic (what time do they need to wake up so that they could greet the kids in the morning @8?).
They also possess a sense of humor (especially when the unexpected should happen in class), strong, projecting voice that should last all day, everyday, strong legs (to be able to stand all day long), strong back and knees (being able to bend down to talk to little ones without having to call an ambulance).
They are also great readers in every way (stories, books and scratchy hand writings that are just impossible to recognize) and attentive listeners (being able to listen to 5 different versions of the same situation during a playground fight IS a talent.)
So, hats off to you, teachers!
Inspired by how the teachers are carrying the students through the school year, I made this bag for Miss W.
I wanted this bag to be roomy, simple, durable and funso I could have fun making it, too.
This is how I made it:
Body of Bag:
Teachers have so many amazing qualities: patient (to both the students and the parents), loving, smart (let's never forget this one!), encouraging, creative, resourceful, patient (did I mention this one already?) and energetic (what time do they need to wake up so that they could greet the kids in the morning @8?).
They also possess a sense of humor (especially when the unexpected should happen in class), strong, projecting voice that should last all day, everyday, strong legs (to be able to stand all day long), strong back and knees (being able to bend down to talk to little ones without having to call an ambulance).
They are also great readers in every way (stories, books and scratchy hand writings that are just impossible to recognize) and attentive listeners (being able to listen to 5 different versions of the same situation during a playground fight IS a talent.)
So, hats off to you, teachers!
Inspired by how the teachers are carrying the students through the school year, I made this bag for Miss W.
I wanted this bag to be roomy, simple, durable and fun
This is how I made it:
Body of Bag:
Cut 2 pieces of denim (19"x16"), 2 pieces of printed fabric (19"x12").
Turn under 1/2" on one side of each denim piece. Iron well then stitch.
Applique letter "W" in the center (lengthwise), a few inches below the stitched line.
With right side facing, piece in the order of "denim, printed fabric, printed fabric, denim" (with the stitched lines of denim on the far ends). Top stitch on the right side.
Note: I only lined the printed fabric (hand stitched the lining) since denim is quite sturdy so the bag is not heavy.
Making Handles:
Cut 2 pieces of 16" long denim at 1 1/2" wide and 2 pieces of 16" printed fabric at 1 3/8" wide.
Note:The extra width of the printed fabric will wrap around to the denim side to create that faux piping look.
The Bottom of Bag:


Follow TingTingMamMa
Top stitch.
The Bottom of Bag:
Almost done!
Stitch both sides of the bag with 1/2" seam allowance. Iron the seams open.
Turn the bag right side out and iron well. I cut a board to size to support the bottom.
The sides of bag will have two beautiful triangles (pictured in the right center). I am fond of this "paper bag style". I hope this bag will bring a smile on Miss W's face.
featured on...


Posted by
Deb

Subscribe to:
Posts (Atom)


