Wednesday, October 28, 2015
Organza Hair Bows
The youngest is already into the color black. For her dance classes, she only wears black leotard and black dance t-shirts. I need to add a little color into her dance wear. Thankfully, she loves these hair bows. Let's see how long it takes her to ask for a black one.
Follow TingTingMamMa
Posted by
Deb
0
comments
Labels:
DIY
Thursday, June 11, 2015
Sunday, May 31, 2015
Zipper Pencil Pouch
I made a sundress for F 2 years ago. The fabric has really beautiful gradation of color that reminds me of sunset. I used this same fabric to make a pencil pouch for one of JJ's best friend, AL. I hope this pouch brings her a smile every time she uses it. =)
Follow TingTingMamMa
Thursday, May 21, 2015
AJ Zipper Pouch
This is a birthday gift for a very creative and artistic friend who makes everyone she talks to feel special and cared for. AJ is generous and so kind. She's stylish yet modest. She's definitely a beautiful lady inside and out. Happy birthday, AJ!
Posted by
Deb
Saturday, March 28, 2015
Hosanna!
Hosanna! God saves!
My way of walking with Jesus in preparation for the holy week is to remember what the cross means.
Two weeks ago, after children's church, I saw a long snapped tree branch in the middle of the parking lot and brought it home. I thought about the different projects I could make with this branch. Then, this idea came.
My devotion has been about the priesthood, Tabernacle and reconciliation. This project is an appropriate reflection that my Lord, the ultimate high priest, Jesus, has paid the price once and for all to redeem the sinful and to reconcile them to God. Hosanna! God saves! Praise the Lord.
Follow TingTingMamMa
My way of walking with Jesus in preparation for the holy week is to remember what the cross means.
Two weeks ago, after children's church, I saw a long snapped tree branch in the middle of the parking lot and brought it home. I thought about the different projects I could make with this branch. Then, this idea came.
My devotion has been about the priesthood, Tabernacle and reconciliation. This project is an appropriate reflection that my Lord, the ultimate high priest, Jesus, has paid the price once and for all to redeem the sinful and to reconcile them to God. Hosanna! God saves! Praise the Lord.
-
- On a hill far away stood an old rugged cross,The emblem of suff’ring and shame;And I love that old cross where the Dearest and BestFor a world of lost sinners was slain.
- Refrain:So I’ll cherish the old rugged cross,Till my trophies at last I lay down;I will cling to the old rugged cross,And exchange it someday for a crown.
- Oh, that old rugged cross, so despised by the world,Has a wondrous attraction for me;For the dear Lamb of God left His glory aboveTo bear it to dark Calvary.
- In that old rugged cross, stained with blood so divine,A wondrous beauty I see,For ’twas on that old cross Jesus suffered and died,To pardon and sanctify me.
- To the old rugged cross I will ever be true;Its shame and reproach gladly bear;Then He’ll call me someday to my home far away,Where His glory forever I’ll share.
Posted by
Deb
0
comments
Labels:
faith
Thursday, March 19, 2015
Zippered Phone Pouch
After a few weeks at my new job, I was very happy to be sewing again. This time, I was sewing for my friend SL. I call this pouch her "good job sticker"! Thanks, SL, for being so patient and trustworthy! Hope you think the wait was worth it.
Follow TingTingMamMa
Posted by
Deb
0
comments
Labels:
DIY,
pouch,
sewing
Wednesday, January 21, 2015
Vintage Finds
There were a few pieces of strawberry napkins. Cute!
Lovely laces.
Spools of colorful thread (will find out if they are "too vintage" to use).
I am so thankful that at this day and age, I could find instructions for ANYTHING online. Click here for the link. Guess I will be playing with rhinestones pretty soon.
Then came THIS.
It opens up to reveal several compartments. I immediately thought, "hey, great for cupcakes!" (sorry, it was lunch time and I was overdue for a meal.) Then, again, it might be best for jewelry storage on a nightstand. LOVE the cherry embroidery.
Loads of buttons!
While the buttons now are almost always made in China with no description in the back, these buttons were mostly made in Japan, with "Guaranteed washable" printed in the back.
I don't see Sears buttons anymore. Not to mention for just 49 cents. The others were 29 cents. Again, guarantee to be washable!
Guess there used to be a Vallco Drug that sold discounted Chic buttons for 12 cents a package.
Lastly, a few yard of Italian waist band elastic (the wrapping board was a piece of wood, not cardboard) and washing instructions (with extra button and yarn) for a sweater.
I promised the lady that I would send her a picture of how I utilize these sewing materials. Thank you, for passing down a piece of your life to me.
Thursday, January 15, 2015
Tutorial: Easy Zipper Yarn Dispenser Bag
It all began with one multi-colored shower curtain. From the same curtain, I've made a tripod bag, a trash bag for the car and a back support pillow. I love the vibrant colors, the stripes, the heavier weight fabric and the grommets.
I wanted to utilize the grommets and thought a yarn dispenser bag would do just that.
Here's how I made the zipper yarn dispenser bag:
Cut a piece of fabric measuring 11" x 26". (I have folded the curtain lengthwise, thus it appears to be 11" x 13" in the picture.)
Be sure to put into consideration the grommet placement and that the grommets should be on one of the shorter ends.
*Since the grommet end is already finished, you will be attaching the zipper and top stitching with just one step!
Mark the center of the zipper (13" long) and the shorter ends of fabric. With the zipper right side up, lay the fabric (grommet end, right side up) on the zipper, and match center marks.
Pin, pin, pin.
Change your sewing foot to a zipper foot and stitch.
Now, attaching the other side of the zipper with right side of the zipper and right side of fabric facing. Match center marks, pin and stitch. Turn the fabric right side out. Top stitch.
*OPEN the zipper! (so you could turn the bag right side out with you are done sewing.)
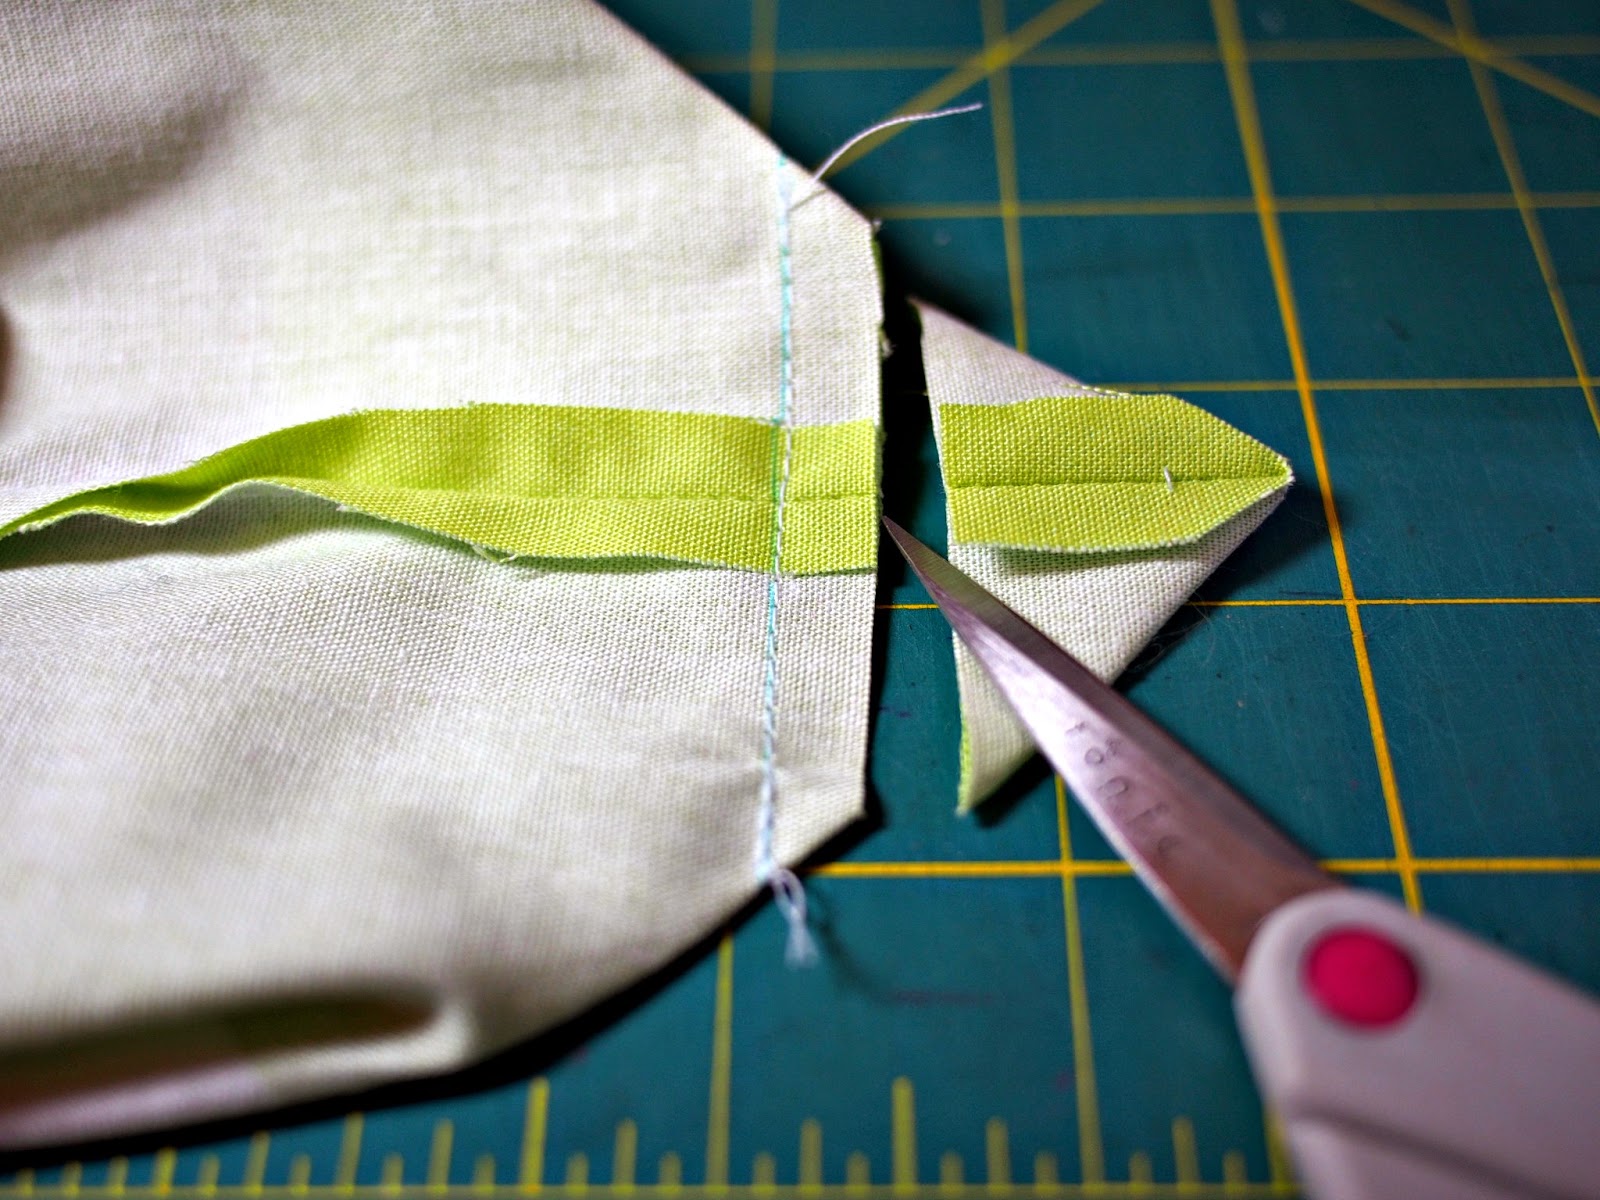
Turn the fabric wrong side out. Leave 1 1/2" on top of the zipper, pin and stitch both open ends close. (stitch over the zipper back and forth a few times) Clip the excess zipper ends.With the seam facing up, pull one the bottom corners to create a point.
Measure 1 1/2" from the point and mark sewing line with water soluble pen.
You could clip the raw edges with pinking shears. Or...
Bind it with bias tape.
Cut single fold bias tape 1/2" to 3/4" longer than the raw edge.
Unfold the bias tape lengthwise. With wrong side facing up, lay bias tape along the raw edge. Fold in the 2 short ends of bias to match the length of raw edge. Pin.
Stitch right on the fold closest to the edge. Then, fold the bias tape to the other side. Fold in the 2nd fold to sandwich the raw edge and pin.
Select a short zig zag stitch on your machine.
Stitch. Turn the bag right side out.
Put your ball/skein of yarn in the bag and thread the yarn through the grommet. I am now ready to knit my next project!
Posted by
Deb
Subscribe to:
Posts (Atom)